

Hey there, welcome to my little corner of the internet! I’m Alex, and I’m so glad you’re here, especially if you’re dreaming of a backyard that feels truly yours. I remember when my outdoor space felt a bit… bland. I wanted something more, something personal, but I didn’t want to break the bank. That’s when I discovered the magic of creating unique pieces myself. There’s just this incredible joy and satisfaction that comes from stepping back and admiring something beautiful you’ve made with your own hands. Today, I’m excited to share a treasure trove of Outdoor Garden Decor Ideas DIY Projects that will inspire you to transform your patio, balcony, or sprawling yard into a personalized oasis without emptying your wallet.
TABLE OF CONTENTS
Creativity: Why DIY Outdoor Garden Decor Ideas Are a Game Changer
I truly believe that diving into DIY for your garden is an absolute game-changer. It’s more than just saving a few dollars, though that’s certainly a perk! For me, it’s about infusing my personality into every nook and cranny of my outdoor space. When I repurpose an old item, I’m not just making something new; I’m giving it a second life, which feels wonderfully sustainable.
The process of crafting these Outdoor Garden Decor Ideas DIY Projects is also incredibly therapeutic. There’s something so calming about focusing on a creative task, watching it come to life. Whether your space is tiny or vast, these projects let you create a truly unique reflection of who you are. It’s about building a home that extends beyond your four walls.
Crafting Your Oasis: Essential DIY Outdoor Garden Decor Ideas & Projects
This is where our creative journey truly begins! I’ve gathered some of my favorite Outdoor Garden Decor Ideas DIY Projects to get you started. I hope you find as much joy in making them as I do.
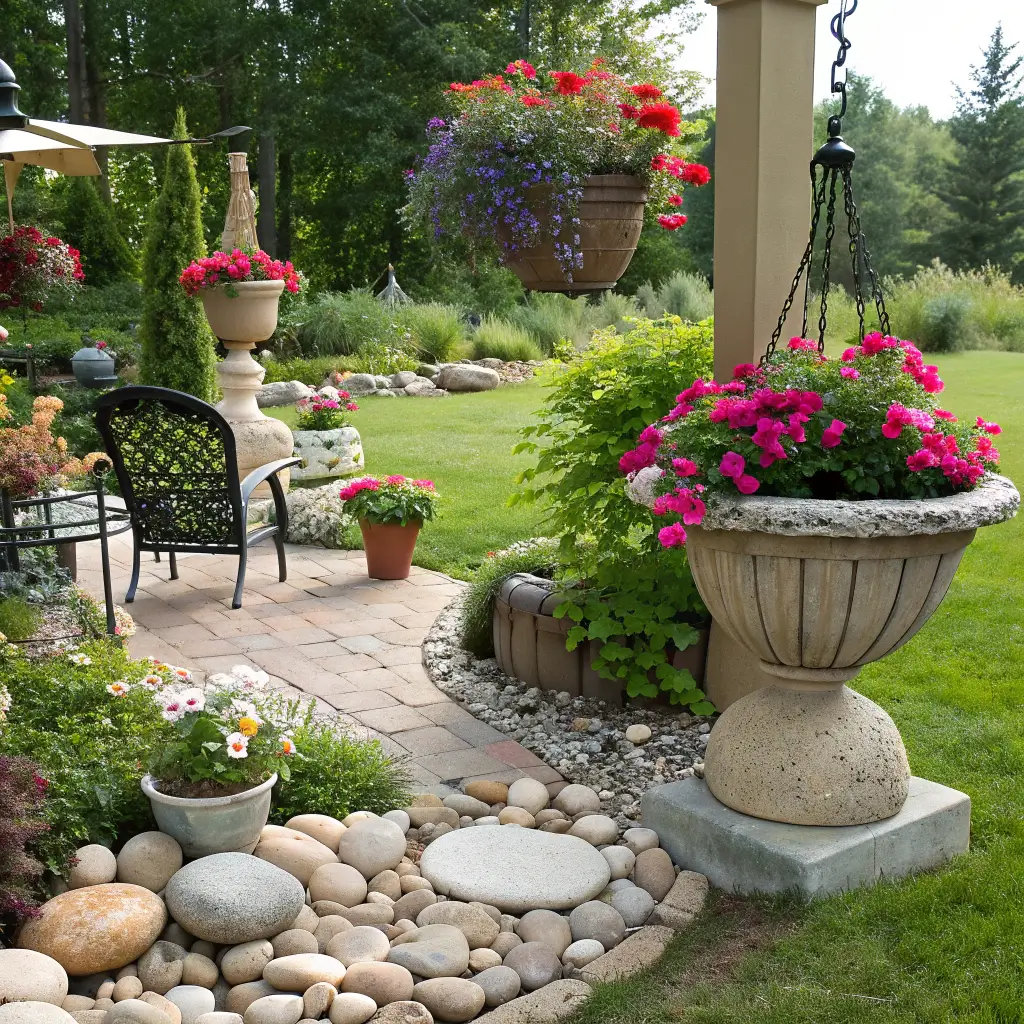
Planters & Container Gardens: Versatile & Vibrant Outdoor Garden Decor Ideas
I love finding unexpected ways to bring plants into my space. Thinking outside the traditional pot is one of my favorite challenges.
- Repurposed Colander Hanging Planters: This project is a fantastic example of turning something old into something wonderfully new!
- Materials: Old metal colander, exterior spray paint (optional, for a pop of color), three lengths of durable chain or strong rope, S-hooks or a sturdy metal ring for hanging, coconut liner or landscape fabric, potting soil, your favorite plants (vines or trailing plants look especially lovely).
- Tools: Drill (if your colander doesn’t have existing holes for chains), wire cutters (for chain), scissors (for liner).
- Estimated Time/Difficulty: Beginner, 30 minutes (plus drying time for paint).
- Instructions:
- Clean your colander thoroughly. If you want to paint it, do so in a well-ventilventilated area, applying thin, even coats. Let it dry completely.
- If your colander doesn’t have holes near the rim, drill three evenly spaced holes.
- Attach your chains or ropes to these holes, securing them firmly. Bring the three lengths together at the top with an S-hook or metal ring for hanging.
- Line the colander with a coconut liner or landscape fabric, pushing it gently into the shape of the colander. The colander’s holes will provide excellent drainage!
- Fill with potting soil and plant your chosen beauties, perhaps some amazing prettiest pink plants for an extra pop of color. Hang it up and admire your resourceful creation!
- Colorful Rope-Wrapped Pots: If I have some plain terracotta pots lying around, I often update them by wrapping them with sisal or cotton rope. I simply use a hot glue gun to attach the rope, starting from the bottom and winding my way up. Sometimes, I’ll even paint sections of the rope after it’s glued on for a vibrant splash of color. It’s an easy way to give old pots a fresh, textured look.
- Vertical Succulent Wall Garden: For small spaces, I love going vertical! You can easily create a simple vertical garden using an old wooden pallet turned on its side or by stacking tiered shelves. I line the inside of the pallet slats with landscape fabric or use small individual pots, then fill them with succulents or herbs. It’s perfect for adding greenery without taking up precious floor space, and Alex says succulents are very forgiving.
Pathways & Ground Accents: Guiding & Enchanting Outdoor Garden Decor Ideas
I think the journey through your garden should be just as charming as the destination. These ideas help add character to the ground beneath your feet.
- DIY Mosaic Stepping Stones: Personalizing your pathways is so much fun, and these mosaic stepping stones are a wonderful way to do it.
- Materials: Quick-setting concrete mix, sturdy molds (plastic plates, old cake pans, or specialized stepping stone molds work great), broken tiles, glass gems, colorful pebbles, sea glass, or bits of old costume jewelry, water, cooking oil spray or petroleum jelly (for mold release), gloves.
- Tools: Trowel or sturdy stirring stick, bucket for mixing concrete, safety glasses.
- Estimated Time/Difficulty: Intermediate, 1-2 hours (plus 24-48 hours drying/curing time).
- Instructions:
- Lightly grease the inside of your mold with cooking oil spray or petroleum jelly; this helps the concrete release easily.
- In a bucket, mix the concrete according to the package directions. I always wear gloves and safety glasses for this part. The consistency should be like thick oatmeal.
- Pour the concrete into your mold, filling it about halfway. Tap the mold gently to release any air bubbles.
- Start arranging your decorative elements onto the wet concrete. Press them down firmly so they are embedded and flush with the surface. Be creative with your patterns and colors!
- Fill the mold the rest of the way with concrete, carefully covering the back of your mosaic pieces. Smooth the surface with your trowel.
- Let the stepping stone cure for at least 24-48 hours in a cool, shaded spot, keeping it slightly damp for the first day by covering it with plastic or a damp cloth. Once cured, carefully pop it out of the mold.
- Upcycled Bowling Ball Gazing Balls: I once saw a neighbor (I think it was Alex!) who took old bowling balls, painted them with bright, weather-resistant paint, and then mosaiced them with colorful broken dishes. They looked like giant, whimsical ornaments nestled among the plants. It’s a fantastic way to add a pop of color and a focal point to your garden.
- Painted River Rock Garden Markers: This is such a simple and sweet project! I gather smooth river rocks and use outdoor acrylic paint to label my herbs or flowers, or simply paint pretty designs on them. A clear sealant keeps the designs vibrant through rain and sun.
Lighting & Ambiance: Sparkle & Serenity with DIY Outdoor Garden Decor Ideas
I believe good lighting can utterly transform an outdoor space, making it feel magical as dusk settles. These projects are charming and budget-friendly.
- Solar Jar Lanterns: These are incredibly easy to make and add such a lovely, soft glow to any garden path or patio.
- Materials: Mason jars (various sizes work well), inexpensive solar path lights (the kind with a stake; I usually find these at dollar stores), strong adhesive (like E6000 or marine-grade sealant), wire or decorative handles (optional), small decorative elements (pebbles, sand, sea glass, faux flowers) for inside the jar.
- Tools: Screwdriver (to disassemble solar light), wire cutters (if adding handles).
- Estimated Time/Difficulty: Beginner, 15-20 minutes per lantern.
- Instructions:
- Carefully disassemble your solar path light. You’ll typically separate the light unit (which contains the solar panel, battery, and LED bulb) from the stake and housing. Keep the light unit intact.
- Place a small amount of strong adhesive around the rim of the mason jar lid (the flat part) or directly onto the solar light unit’s base, ensuring it will seal securely when placed on the jar.
- Center the solar light unit upside down into the mason jar lid. Press firmly to create a good seal. Let the adhesive cure according to the manufacturer’s instructions.
- If you want to hang your lantern, attach a wire handle around the neck of the jar. You can also add decorative elements inside the jar, like pebbles or faux flowers, before screwing on the lid with the attached solar light.
- Place your new solar jar lanterns where they’ll get plenty of sunlight during the day, and enjoy their gentle glow at night!
- DIY Outdoor Candleholders from Cans: This is a classic, simple project. I take empty tin cans, clean them well, and then use a hammer and nail to punch decorative patterns into them. After that, I paint them with outdoor spray paint. When a votive candle is placed inside, the light flickers beautifully through the holes. Pro-tip: Always place candleholders on a stable, non-flammable surface and never leave burning candles unattended.
- Repurposed Wine Bottle String Lights: For a truly unique lighting display, I’ve seen people carefully string small LED fairy lights through empty wine bottles. You might need to remove the bottle bottoms (which can be tricky and requires special tools, so please be careful or look for specific light strings designed for this). The colored glass casts a lovely hue, and they look stunning hanging from a pergola or strung along a fence.
Sound & Wildlife Attractions: Harmonious & Lively DIY Outdoor Garden Decor Ideas
I love inviting nature’s symphony into my garden. A gentle chime or the flutter of wings adds so much life to the space.
- Silverware Wind Chimes: I think these chimes are so charming and make such a delightful, delicate sound.
- Materials: Old silverware (forks, spoons, knives), drill, small drill bit suitable for metal, fishing line or strong thin wire, driftwood branch or metal ring for the top, beads (optional, for decoration).
- Tools: Drill, vice or clamps (to hold silverware steady), wire cutters/scissors.
- Estimated Time/Difficulty: Intermediate, 1 hour.
- Instructions:
- Carefully drill a small hole near the end of the handle of each piece of silverware. Use a vice or clamps to secure the silverware firmly while drilling, and always wear safety glasses.
- Cut varying lengths of fishing line or wire. For each piece of silverware, thread one end of the line through the drilled hole and tie a secure knot. If you’re using beads, thread them onto the line before attaching the silverware, or space them out as you like.
- Attach the other end of each line to your driftwood branch or metal ring. Vary the lengths of the lines so the silverware pieces hang at different heights, allowing them to chime against each other.
- Add a hanging loop to your driftwood or ring, and your unique wind chime is ready to serenade your garden!
- Flowerpot Birdhouses: Alex is a big fan of attracting birds, and these birdhouses are adorable. I simply stack two or three terracotta pots of varying sizes, gluing them together with outdoor adhesive. I leave a gap between two pots to create an opening for the birds, and sometimes add a small stick as a perch. It’s a rustic and inviting home for our feathered friends.
- Simple Bird Bath from a Large Leaf: This is a wonderfully naturalistic bird bath. I find a large, sturdy leaf, like a rhubarb leaf, and use it as a mold. I spread a layer of concrete mix over the underside of the leaf, pressing it gently to capture the leaf’s veins. Once dry, I peel away the leaf, and I’m left with a beautiful, organic-shaped bird bath. Alex says “Plants want to live,” and I think birds want to drink!
Vertical & Wall Art: Maximizing Small Spaces with Outdoor Garden Decor Ideas
Olivia is amazing at making small spaces feel huge. She always tells me to look up! Utilizing vertical space is a smart way to add decor and greenery, especially if your garden is on the smaller side.
- Garden Tool Trellis: I love how quirky and functional this project is, especially for a rustic-style garden.
- Materials: Old rake heads, shovel handles, or other sturdy garden tools; heavy-gauge wire or twine; wood screws or mounting hardware suitable for outdoor use.
- Tools: Drill, screwdriver, wire cutters, saw (if you need to cut tool handles).
- Estimated Time/Difficulty: Intermediate, 45 minutes.
- Instructions:
- Clean any rust or dirt from your old garden tools. If your tool handles are too long, you might need to saw them down to your desired length.
- Arrange your tools into a trellis design. I usually lay them out on the ground first to get the spacing right. You can crisscross them, create a ladder effect, or stack them.
- Use heavy-gauge wire or sturdy twine to secure the tools together at their intersecting points. Wrap tightly and knot securely. For a more permanent fixture, you can drill small pilot holes and use wood screws.
- Mount your finished trellis to a sturdy fence, wall, or even stake it into the ground. Ensure it’s stable enough to support climbing plants.
- Pallet Wall Planter: Another great vertical option! I take an old wooden pallet, seal it with an exterior-grade sealant, and then turn it on its side. The spaces between the slats become perfect pockets for planting herbs, strawberries, or colorful annuals. I sometimes add landscape fabric to the inside of the pockets to hold the soil. Jonas also wired our whole blog from scratch, so he appreciates efficiency in design!
- Fan Blade Flowers: This is a truly unique piece of wall art. I’ve seen people take old metal fan blades, paint them in bright, cheerful colors, and then arrange them on a fence or wall to look like giant, abstract flowers. It adds such a vibrant, sculptural element to the garden. Olivia would definitely approve of the bold colors!
Whimsical & Personalized Touches: Adding Character with DIY Outdoor Garden Decor Ideas
Your garden should feel like an extension of your home, reflecting your personality and sense of fun. These projects add those special, personal touches.
- Hand-Painted Garden Signs: I absolutely adore adding little signs to my garden; they just make the space feel so welcoming and unique.
- Materials: Unfinished wood planks or scraps (weather-resistant wood like cedar or pine is ideal), exterior-grade weatherproof paint (acrylic or chalk paint specifically for outdoor use), stencils or paintbrushes for lettering, clear exterior sealant (spray or brush-on), chain or wire for hanging (optional).
- Tools: Sandpaper (for smoothing wood), paintbrushes, ruler/pencil (for layout).
- Estimated Time/Difficulty: Beginner/Intermediate, 1 hour (plus drying time for paint and sealant).
- Instructions:
- Lightly sand your wood plank to smooth any rough edges. Wipe away dust.
- Plan your sign’s message and design. You can freehand it, use stencils, or even print out letters and trace them onto the wood. Jonas is great with layouts, so I always ask him for advice here.
- Apply your weatherproof paint. If you’re using multiple colors, let each color dry completely before applying the next.
- Once all the paint is dry, apply several coats of a clear exterior sealant to protect your sign from the elements. This is crucial for durability!
- If you want to hang your sign, attach a chain or wire to the back. Otherwise, you can lean it against a fence or stake it in the ground.
- Fairy Garden Scenes: This is a wonderfully whimsical project that sparks so much joy. I use an old container or a shallow planter as the base and then arrange miniature houses, tiny furniture (you could even make your own with clay crafts), small plants like moss or succulents, and little accessories to create a magical world for imaginary fairies. It’s a sweet, enchanting touch, especially for a quiet corner.
- Custom Welcome Mat: Your garden’s entrance deserves a warm welcome! I buy a plain coir doormat and use outdoor stencils and weatherproof paint to add a custom design, a fun quote, or even my house number. It’s an easy way to add a personalized touch right at the threshold.
Choosing Your Perfect DIY Outdoor Garden Decor Project
With so many exciting Outdoor Garden Decor Ideas DIY Projects out there, I know it can feel a little overwhelming to pick just one. I always tell my friends to consider a few key things to make sure the project is a perfect fit for them and their space.
| Factor | Considerations |
|---|---|
| Skill Level | Are you a beginner, intermediate, or advanced DIYer? Start simple and build confidence! |
| Time Commitment | How much time do you have? Some projects are 30-minute quick fixes, others require a weekend. |
| Budget | What’s your budget? Focus on repurposing, upcycling, or inexpensive new materials. |
| Garden Size | Do you have a small patio, a sprawling yard, or just a balcony? Choose projects that fit your space. |
| Desired Style | What’s your garden’s aesthetic? Rustic, modern, whimsical, traditional? Let your decor complement it. |
| Material Availability | Do you have scrap materials or easy access to inexpensive supplies? |
Making Your DIY Outdoor Decor Last: Durability & Weatherproofing Tips
I’ve learned the hard way that a beautiful DIY project needs to be built to last, especially when it’s going to live outside. My goal is always to make sure my hard work stands up to the elements.
- Sealants & Paints: This is crucial! I always use exterior-grade paints, varnishes, and sealants. Look for products specifically designed for outdoor exposure, as they offer UV protection to prevent fading and are waterproof to resist moisture damage.
- Material Selection: When I’m choosing materials, I try to pick things that are inherently durable outdoors. Treated wood, marine-grade plywood, cedar, and certain metals like galvanized steel or aluminum are great choices. If I’m using something less durable, I make sure to give it extra protection.
- Drainage: For any planters or items that will hold soil and plants, proper drainage is absolutely essential. I always ensure there are sufficient holes in the bottom to prevent waterlogging, which can lead to root rot and material decay. Alex is always reminding me about healthy plants!
- Anchoring: Wind and heavy storms can quickly turn your beautiful decor into flying projectiles. I make sure to anchor larger pieces, like trellises or sculptures, securely to the ground or a fence using stakes, heavy bases, or strong mounting hardware.
- Winter Storage: For more delicate items, or things that aren’t specifically rated for extreme cold or snow, I bring them indoors during harsh winters. Storing them in a garage, shed, or even a protected corner of my home extends their life significantly.
Smart Sourcing: Budget-Friendly Materials for Your Outdoor Garden Decor DIY Projects
One of my favorite parts of creating Outdoor Garden Decor Ideas DIY Projects is the thrill of the hunt for materials! Repurposing is not only budget-friendly but also adds such character to your creations.
- Thrift Stores & Yard Sales: These are absolute goldmines! I always look for old tools, silverware, interesting furniture pieces (even if they’re broken, they might have usable parts), glass jars, and unique dishes that can be transformed. Olivia always finds the most interesting mismatched chairs.
- Nature’s Bounty: Sometimes, the best materials are right outside your door. I use fallen branches, beautiful stones, pinecones, and even sturdy leaves (like rhubarb or hosta leaves for concrete projects).
- Dollar Stores & Discount Retailers: Don’t underestimate these! I often find inexpensive craft supplies, small solar lights, basic tools, and little trinkets that can be incorporated into projects here.
- Reclaimed Materials: Pallets are my absolute favorite for free wood. You can often find them behind businesses or at construction sites (just be sure to ask for permission!). Old fences and scrap wood can also be fantastic resources.
- Your Own Home: Before you buy anything, take a look around your house! Old mason jars, empty cans, broken tiles, forgotten toys, even old clothing can be repurposed into something beautiful for your garden.
Safety First: Essential Tips for Your DIY Garden Decor Endeavors
As much as I love getting creative, I always put safety first. I want your DIY journey to be enjoyable and injury-free!
- Tool Safety: Always read the manuals for any power tools you’re using. I make sure to wear protective gear like gloves and safety glasses, especially when drilling, sawing, or hammering. Handle sharp tools with care.
- Material Handling: Be cautious of sharp edges, splinters from wood, and potentially toxic paints or adhesives. I always work in a well-ventilated area when using sprays or strong glues and wear gloves when working with wet concrete or chemicals.
- Lifting & Ergonomics: If you’re working with heavy objects, lift with your legs, not your back, to avoid injury. Ask for help if something feels too heavy.
- Electrical Safety: For any projects involving outdoor lighting or power tools, always be mindful of electrical safety. Ensure cords are rated for outdoor use, and never use electrical items near standing water.
Frequently Asked Questions About Outdoor Garden Decor DIY Projects
I get a lot of questions about these projects, so I wanted to share some of the common ones to help you out!
- “What’s the easiest DIY garden decor project for a complete beginner?” I think solar jar lanterns, painted river rock garden markers, or custom welcome mats are fantastic starting points for beginners. They require minimal tools and skill, offering a quick win to boost your confidence!
- “How can I make my DIY decor weather-resistant without spending a lot?” The key is smart material choices and sealants. I look for exterior-grade paints and varnishes on sale. Repurposing naturally durable items like galvanized metal or treated wood helps. For wooden projects, even inexpensive exterior wood glue and a good coat of polyurethane can make a big difference.
- “Where can I find free or cheap materials for my projects?” My top spots are yard sales, thrift stores, and sometimes even the side of the road on trash day (if it looks clean and safe to take). Nature also provides amazing free materials like branches and stones. Don’t forget your own recycling bin for jars and cans!
- “Can I involve my kids in these DIY garden projects?” Absolutely! Many projects are perfect for kids with supervision. Painting rocks, decorating solar jars, or helping to plant a fairy garden are wonderful ways to get them involved and foster their creativity. Just make sure to prioritize safety with tools and materials.
- “How do I choose colors for my outdoor decor?” I like to consider my home’s exterior colors and the natural colors of my plants. You can choose colors that complement or contrast. Olivia, our resident color expert, loves bold colors but also emphasizes that natural tones always look beautiful. Don’t be afraid to experiment, and remember, a fresh coat of paint can always change things!
Your Garden, Your Masterpiece: Let’s Get Crafty!
I truly believe that creating your own Outdoor Garden Decor Ideas DIY Projects brings immense satisfaction and a unique beauty that store-bought items just can’t match. It’s an opportunity to truly make your outdoor space a masterpiece, a reflection of your own creativity and spirit. For more brilliant design advice for any space, pull up a chair (perhaps one with a new throw pillow from Olivia’s advice!), embrace your inner artist, and enjoy the process of transforming your garden.
I’d love to hear about your favorite DIY garden decor projects or any challenges you’ve faced. Share your experiences, tips, or questions in the comments below – let’s inspire each other to create stunning outdoor sanctuaries!