

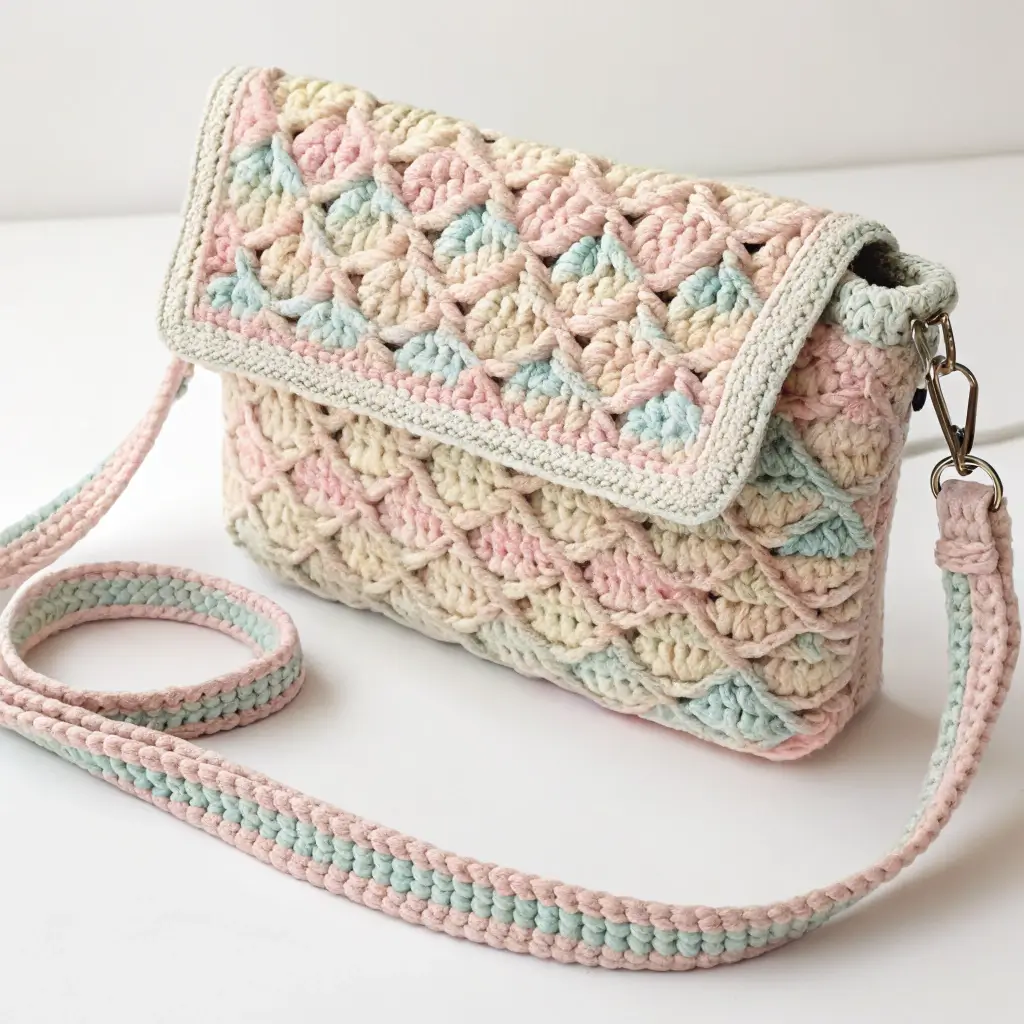
Hey there, fellow crafter! I’m so excited to chat with you today about something truly special: creating your very own Easy Crochet Folded-Rectangle Crossbody Bag. I remember the first time I realized a simple rectangle could transform into a functional, beautiful accessory; it felt like pure magic! There’s such a unique joy in making something with your own hands, and then being able to carry it proudly every day. This project is perfect for you if you’re looking for something that’s simple to construct, quick to finish, and incredibly versatile in style. I promise, even if you’re new to crochet, you’ll be amazed at how easily a humble rectangle can become a fabulous, personalized crossbody bag!
TABLE OF CONTENTS
Why You’ll Love Crafting This Easy Crochet Folded-Rectangle Crossbody Bag
I know how wonderful it feels to start a project and see quick progress, especially when you’re learning something new or just want a satisfying make. That’s exactly why I think you’ll adore creating this folded-rectangle crossbody bag. It really is a fantastic project for both beginners and more experienced crocheters. If you enjoy hands-on crafting, you might find inspiration for your next DIY project on our site.
Here’s why I think you’ll love it:
- Minimal Shaping: The beauty of a folded rectangle is that you’re mostly crocheting a flat panel. This means no complicated increases, decreases, or intricate shaping, which makes it super approachable.
- Simple Stitch Repeats: I’ll guide you through using basic stitches, often in easy-to-remember repeats. This allows you to get into a rhythm, making the process relaxing and enjoyable.
- Quick Gratification: Because you’re working on a single panel, you’ll see your bag take shape relatively fast. There’s nothing quite like that feeling of seeing your creation come to life quickly!
- Infinitely Customizable: This simple design is a blank canvas! You can easily adjust its size, experiment with different yarn textures, or add your own unique embellishments to truly make it yours. If you’re interested in exploring other crochet bag styles, check out our Ultimate Granny Square Crochet Bag Guide.
The whole concept of “Why a Folded Rectangle?” comes down to simplicity and clever design. By simply folding a rectangular piece of fabric, you create the structure of a bag with minimal fuss, transforming a flat piece into a three-dimensional marvel. It’s truly ingenious!
Gathering Your Materials & Tools for Your Crochet Crossbody Bag
Before we dive into the stitches, let’s make sure you have everything ready. Choosing the right materials is the first step toward a beautiful and durable bag, and it can really make a difference in your crafting experience. I’ve found that having my favorite hook and a comfy yarn makes the whole process so much more enjoyable.
Yarn Deep Dive: Choosing Your Perfect Fiber for Durability and Style
Selecting the right yarn is crucial for your bag’s look, feel, and how well it holds up. I always recommend considering what kind of structure and drape you want for your finished bag.
Here are a few common options and what I love about them:
| Yarn Type | Properties | Pros | Cons |
|---|---|---|---|
| Cotton | Structured, durable, good stitch definition | Holds shape well, strong, natural fiber | Can be heavy, less drape, takes longer to dry |
| Acrylic | Soft, affordable, wide color range, easy care | Budget-friendly, vast color options, hypoallergenic | Can pill with friction, less breathable |
| Blends | Combines properties, varied drape | Offers best of both worlds (e.g., cotton/acrylic for drape and structure) | Properties vary widely by blend, may be harder to find |
For this particular crossbody bag, I typically suggest a medium-weight (worsted weight, size 4) cotton or cotton blend yarn. Cotton gives the bag a nice, firm structure, which is great for holding its shape. A blend, like cotton-acrylic, can offer a bit more drape while still providing durability. You’ll need approximately 250-300 yards of yarn for a standard-sized bag. If you choose a heavier or lighter yarn, remember your yardage might change, and your finished bag dimensions will too!
Hook Size & Essential Notions
For your medium-weight yarn, I recommend starting with a H/8 (5.0 mm) crochet hook. This size generally works well to create a fabric that’s firm enough for a bag, but not too stiff.
Here’s a list of the essential notions you’ll definitely need:
- Scissors: For cutting your yarn.
- Tapestry Needle: Absolutely essential for weaving in those ends neatly and seaming your bag together.
- Stitch Markers: These are your best friends for keeping track of your rows and stitches, especially in the beginning.
And here are a few optional notions you might consider for extra flair or functionality:
- Magnetic Snap or Button: For adding a closure to your bag.
- Lining Fabric: If you want to add an extra layer of durability and a polished finish.
- D-rings and Clip-on Strap: For a removable strap option.
Understanding Dimensions & Gauge: Getting Your Bag Just Right
I know, “gauge” can sound a bit intimidating, especially if you’re new to crochet, but trust me, it’s really just a fancy word for how many stitches and rows you get per inch with your chosen yarn and hook. For a project like a bag, getting your gauge right ensures your finished item matches the intended dimensions, which is important for the look and functionality of your crossbody!
Your Target Dimensions
For this Easy Crochet Folded-Rectangle Crossbody Bag, my target finished dimensions are:
- Main Rectangle (unfolded): Approximately 10 inches wide by 30 inches long.
- Final Folded Bag (excluding strap): Approximately 10 inches wide by 10 inches high, with a depth of about 2 inches.
Getting Your Gauge Right: A Beginner’s Troubleshooting Guide
To measure your gauge, I want you to crochet a small swatch, about 5 inches by 5 inches, using the stitch pattern we’ll be using for the bag (single crochet, in this case). After you’ve crocheted it, lay it flat and don’t stretch it. Then, use a ruler to count how many stitches you have in 4 inches and how many rows you have in 4 inches.
For our example, I’m aiming for about 16 single crochet stitches and 18 rows in a 4-inch square.
What if your gauge is off? Don’t worry, it happens to everyone! Here’s what I recommend:
- Too many stitches in 4 inches (your fabric is too tight): Your hook is likely too small. Try going up half a hook size (e.g., from 5.0 mm to 5.5 mm).
- Too few stitches in 4 inches (your fabric is too loose): Your hook is likely too large. Try going down half a hook size (e.g., from 5.0 mm to 4.5 mm).
- Tension Troubles: Sometimes it’s not just the hook; it’s how you hold the yarn. Try to relax your grip. Crocheting should be a comfortable, fluid motion, not a battle!
I always suggest taking the time to make a gauge swatch; it really saves you from potential frustration later on. A little preparation goes a long way!
Essential Crochet Abbreviations & Pattern Notes
To make sure we’re all speaking the same crochet language, here are the standard US crochet abbreviations I’ll be using throughout this pattern:
- ch: chain
- sc: single crochet
- sl st: slip stitch
- st(s): stitch(es)
- rep: repeat
- FO: fasten off
- ea: each
And a few pattern notes to keep in mind:
- Turning Chains: The turning chain at the beginning of each row (ch 1 for sc) does NOT count as a stitch unless specifically stated.
- Stitch Count: Always check your stitch count at the end of each row to ensure your edges remain straight and even.
- Working in Rows: We will be working back and forth in rows, turning our work at the end of each row.
Let’s Crochet Your Easy Rectangle Base
This is where the magic begins! I find such joy in watching a flat piece of yarn transform into fabric, stitch by stitch. For this bag, we’re going to create a simple, sturdy rectangle using single crochet, which is perfect for building a strong bag. Remember, the beauty of this project is in the simplicity of this base.
The Foundation Chain: Starting Strong
To begin, I want you to make a slip knot and then chain to your desired width. For our target of a 10-inch wide bag (with our assumed gauge of 4 sc per inch), you’ll need to:
Chain 41. (This will allow for 40 single crochet stitches across, which gives us our 10-inch width).
Make sure your foundation chain isn’t too tight; if it is, try using a hook one size larger just for the foundation chain, then switch back to your main hook for the rest of the project.
Row 1 & Beyond: Building Your Fabric
Now we’re going to start building the body of your bag! We’ll use single crochet stitches, working across each row.
- Row 1: Insert your hook into the second chain from your hook. Work 1 single crochet in each chain across. (You should have 40 sc). Chain 1, turn your work.
- Row 2: Work 1 single crochet in the first stitch and in each stitch across. (You should have 40 sc). Chain 1, turn your work.
Repeat Row 2 until your rectangle measures approximately 30 inches long. This roughly 3x width-to-length ratio (10 inches wide x 30 inches long) is crucial for our folded design, allowing for the main pocket and a nice flap. Keep going, you’re doing great!
Scaling Your Bag: Customizing Dimensions for Your Perfect Crossbody Bag
One of the coolest things about this pattern is how easy it is to customize! If you want a smaller or larger Easy Crochet Folded-Rectangle Crossbody Bag, I want you to feel empowered to adjust the dimensions.
Here’s a simple formula:
- Determine your desired width: Let’s say you want your bag to be 8 inches wide.
- Calculate your starting chain: Multiply your desired width by your gauge (e.g., 8 inches * 4 sc/inch = 32 stitches). Then add 1 for your turning chain (so, chain 33).
- Determine your desired length: Multiply your desired width by 3 (e.g., 8 inches * 3 = 24 inches). You’ll crochet until your rectangle reaches this length.
Just remember that adjusting the size will impact your yarn quantity. A larger bag will need more yarn, and a smaller bag will need less. Always make sure you have enough yarn, or grab an extra skein if you’re unsure!
Transforming Your Rectangle: The Magic of Folding
This is truly the most exciting part, where your flat rectangle magically transforms into the shape of your crossbody bag! Don’t worry; I’ll guide you through each step.
- Lay it Flat: First, lay your finished rectangle perfectly flat on a clean surface. Make sure the side you want to be the “outside” of your bag is facing down.
- Bottom Fold: Take one end of your rectangle and fold it upwards. You want this fold to create the main pocket of your bag. For a 30-inch long rectangle, fold up approximately 10 inches from the bottom edge. This will be the back panel of your bag’s pocket.
- Top Fold (the Flap): Now, take the remaining un-folded section at the top. This will become your bag’s flap. Fold this section downwards, overlapping the bottom folded section. This top flap should also measure approximately 10 inches. When you’re done, you’ll have three layers of fabric: the back panel, the front panel of the pocket, and the flap. The raw edges of the middle layer (the pocket’s opening) should meet the raw edge of the flap, or overlap slightly for the closure.
Just like that, you’ve got the basic shape of your crossbody bag! Isn’t that neat?
Seaming Your Folded-Rectangle Crossbody Bag
Now that your rectangle is beautifully folded, it’s time to seam up the sides to create the actual pocket of your bag. I’ll give you two common methods for sewing the edges; choose the one you feel most comfortable with, or try both to see which you prefer!
Whip Stitch Method
The whip stitch is a straightforward and secure method that creates a visible, yet neat, seam. I find it very simple to do!
- Thread your tapestry needle with a long strand of your working yarn (or a coordinating color).
- Align the side edges of the bottom two layers of your folded bag. These are the layers that form the main pocket.
- Starting from the bottom corner, insert your needle from back to front through both layers of fabric. Leave a small tail to weave in later.
- Wrap the yarn over the edge of the fabric and insert your needle again from back to front, a short distance from your previous stitch, going through both layers.
- Continue wrapping and inserting your needle, making neat, evenly spaced stitches along the entire side seam, always working in the same direction.
- Repeat for the other side of the bag pocket. Once both sides are stitched, weave in all your ends securely.
Mattress Stitch Method (Optional)
The mattress stitch is a favorite of mine when I want a really invisible seam. It pulls the two fabric edges together so the seam practically disappears! It might take a tiny bit more practice, but the result is so clean.
- Again, thread your tapestry needle with a long strand of yarn.
- Lay your folded bag flat, with the right sides (the outside of your bag) facing you. You’ll be working with the edges side by side.
- Starting at the bottom corner, insert your needle from bottom to top, picking up a small horizontal bar of yarn from the first stitch on one side.
- Then, cross over to the opposite side and insert your needle from bottom to top, picking up a corresponding horizontal bar from a stitch on that side.
- Continue alternating sides, picking up one bar on each side, until you reach the top of the pocket.
- Gently pull on the yarn tail to draw the two edges together, making the seam disappear into the fabric.
- Repeat for the other side of the bag pocket. Weave in all your ends neatly.
Crafting & Attaching Your Crossbody Strap
Your bag is almost complete! Now for the essential crossbody strap. I always think about how comfortable a strap feels against my body when I’m out and about. We want one that’s sturdy and the right length for you.
Simple Crocheted Strap Instructions
For a simple yet durable strap, I recommend using single crochet stitches again.
- Foundation Chain: Start by chaining enough stitches for your desired strap width. I usually go for Chain 7 for a strap that’s about 1.5 inches wide, but you can adjust this if you want a wider or narrower strap.
- Row 1: Work 1 single crochet in the second chain from your hook and in each chain across. (You should have 6 sc). Chain 1, turn.
- Row 2 & Beyond: Work 1 single crochet in the first stitch and in each stitch across. Chain 1, turn.
- Repeat Row 2 until your strap reaches your desired length. For an average crossbody fit, I find that a length between 45 to 50 inches works well, but I encourage you to hold a tape measure across your body to find your perfect, ergonomic length! You want it to rest comfortably on your hip without pulling.
- Once you reach your desired length, fasten off, leaving a long tail for sewing.
Alternative Strap Ideas & Hardware for Your Crossbody Bag
Don’t feel limited to a simple single crochet strap! I love seeing how creative people get. Here are some other ideas:
- Wider Strap: Simply chain more stitches in your foundation chain to create a broader strap.
- Different Stitch Patterns: You could try half double crochet for a slightly squishier strap, or even a ribbed pattern (working into the back loop only) for more texture.
- Hardware Attachments: For a professional touch, consider attaching D-rings to the top corners of your bag and using a clip-on strap (either crocheted or store-bought). This makes the strap removable, which is a nice feature!
Attaching Your Strap Securely
This step is crucial; you want your strap to withstand daily use!
- Thread your tapestry needle with the long yarn tail you left on your strap.
- Position one end of the strap on the inside top corner of your bag, right where the flap meets the back panel. I usually place it about 1/2 inch in from the side edge.
- Using your tapestry needle, securely sew the strap to the bag. I like to go through multiple layers of fabric and make several strong stitches in a square or ‘X’ pattern to ensure it’s really attached.
- Repeat for the other end of the strap, attaching it to the opposite top corner of your bag.
- Weave in any remaining ends. Give your strap a gentle tug test to make sure it’s firmly in place!
Finishing Touches & Embellishments for Your Crossbody Bag
Your bag is almost ready to go! This is the fun part where you can really make it shine and add your personal touch. I always encourage creativity; it’s what makes a handmade item truly yours! For more ideas to personalize your crafts, or to explore more creative DIY projects, check out our dedicated section.
Weaving in Ends & Blocking Your Bag
First things first: neatness counts!
- Weaving in Ends: Take your tapestry needle and carefully weave in any remaining yarn tails. I like to weave them in different directions through the fabric for several inches to ensure they won’t come undone.
- Blocking Your Bag: While not always strictly necessary for a bag, blocking can really give your crochet fabric a more polished, even look and help your bag hold its shape beautifully. If you’re using cotton yarn, a gentle wet block (getting it damp, shaping it, and letting it air dry) works wonders. For acrylic, a steam block (gently steaming without touching the iron to the fabric) can soften and relax the stitches.
Adding Closures: Secure Your Crossbody Bag
To keep your belongings safe, I highly recommend adding a closure. Here are some popular ideas:
- Magnetic Snap: My personal favorite! These are easy to sew in. Simply position one half on the inside of the flap and the other half on the front panel of the bag, making sure they align. Stitch them on securely with a needle and thread.
- Button & Loop: Crochet a small chain loop onto the underside of your flap. Then, sew a decorative button onto the front of your bag so the loop can slip over it to close.
- Zipper: For the most secure closure, you can sew a zipper into the opening of your bag. This usually involves adding a fabric lining first, but it’s a fantastic option for peace of mind.
Creative Embellishments: Tassels, Pom-Poms & More
Now for the extra sparkle!
- Tassels or Pom-Poms: I love adding a playful tassel or a fluffy pom-pom to the side of the bag or hanging from the flap. You can easily make your own with leftover yarn or buy pre-made ones.
- Fabric Lining: For added structure, durability, and a clean interior, consider sewing in a fabric lining. It’s a bit more involved, but it elevates the look and feel of your bag significantly.
- Crochet Appliqués: Stitch on a cute crocheted flower, a star, or even an initial to personalize your bag even further!
Care & Maintenance for Your Handmade Crochet Crossbody Bag
You’ve put so much love into creating your bag, so I want to make sure you know how to keep it looking beautiful for years to come! Proper care is really important for handmade items.
Here’s my advice:
- Washing: How you wash your bag largely depends on the yarn you used.
- Cotton Bags: I usually recommend hand washing in cool water with a mild detergent. Gently squeeze out excess water; do not wring.
- Acrylic Bags: These are often machine washable on a gentle cycle in cool water. I always place them in a mesh laundry bag to protect them.
- Blends: Always check the yarn label for specific instructions, as care varies widely.
- Drying: Lay your bag flat on a clean towel or a mesh drying rack to air dry. Reshape it gently while it’s damp. Avoid hanging it, as the weight of the water can stretch it out of shape. Never put a crocheted bag in a machine dryer unless the yarn label specifically says it’s safe, and even then, I’d use a low-heat setting.
- Storing: When not in use, I suggest storing your bag flat or lightly stuffed with tissue paper to help it maintain its shape. Keep it in a dry place away from direct sunlight to prevent fading.
Troubleshooting Common Crochet Challenges for Your Crossbody Bag Project
I know that sometimes things don’t go exactly as planned, and that’s totally okay! We all run into little snags now and then. Here are a few common challenges you might face with this Easy Crochet Folded-Rectangle Crossbody Bag, along with my encouraging solutions:
- Uneven Edges: This is super common, especially for beginners! Often, it’s because you’re either missing the last stitch in a row or adding an extra one. My top tip: use stitch markers in the first and last stitch of every row. This helps you keep track and ensures those edges stay straight. And remember to always count your stitches!
- Loose Stitches or Gaps: If your fabric feels too loose or has noticeable gaps, it usually means your tension is a bit too relaxed, or your hook is too big. Try going down half a hook size, or consciously try to maintain a more consistent, firmer tension while you crochet. Practice really helps here!
- Folding Challenges: If your rectangle isn’t folding into the shape you expected, re-measure your total length. The 3x width-to-length ratio is key for a well-proportioned bag with a good flap. If it’s too short, your flap might be dinky. If it’s too long, your bag could be saggy. Take a moment to adjust if needed, and lay it flat to check your folds before seaming.
Remember, every “mistake” is just a step towards learning and improving. Don’t get discouraged; I’ve been there countless times! Just take a deep breath, unravel a bit if you need to, and keep going. You’ve got this!
Watch the Video Tutorial: Your Visual Guide
Sometimes, seeing someone else do it just makes everything click, right? That’s why I’ve put together a comprehensive video tutorial to walk you through every step of this Easy Crochet Folded-Rectangle Crossbody Bag!
You can find the full video here: \[Insert Video Link Here]
I’ve also tried to make it super easy for you to jump to exactly what you need. Here are some key timestamps to guide you:
- 0:30 – Yarn & Tool Selection
- 1:45 – Understanding Gauge & Swatching
- 4:10 – Crocheting the Foundation Chain
- 6:25 – Working Row 1 & Building the Rectangle
- 11:00 – The Magic of Folding Your Rectangle
- 13:20 – Seaming with Whip Stitch
- 15:55 – Crocheting Your Strap
- 18:40 – Attaching Your Strap Securely
- 20:15 – Adding a Magnetic Snap Closure
- 22:30 – Weaving in Ends & Finishing Tips
I hope this visual guide helps you feel even more confident as you create your beautiful bag!
Frequently Asked Questions (FAQ) About the Easy Crochet Folded-Rectangle Crossbody Bag
I often get questions from fellow crafters, so I wanted to address some of the most common ones about this project here. I hope this helps!
- Can I use a different stitch pattern? Absolutely! Once you understand the basic concept, you can definitely experiment with other stitch patterns like half double crochet (hdc), double crochet (dc), or even a textured stitch like the moss stitch. Just remember that different stitches will affect your gauge, so be sure to make a gauge swatch if you deviate from single crochet. This will ensure your rectangle still achieves the right dimensions.
- How can I make this bag bigger/smaller? It’s incredibly easy to adjust the size! To change the width, simply adjust your starting foundation chain (make sure it’s a multiple of your stitch pattern plus any turning chains). To change the length, just continue crocheting rows until your rectangle is about three times the length of your desired bag width. Always remember to check your gauge when making size adjustments!
- What’s the best yarn for beginners? For beginners, I always recommend a smooth, medium-weight (worsted weight, size 4) acrylic or cotton yarn. These fibers are usually easy to work with, show stitch definition well, and don’t split easily. Avoid very dark colors or novelty yarns at first, as they can make it harder to see your stitches.
- How do I add a lining to my bag? Adding a lining is a great way to give your bag a professional finish and extra durability! You’ll need to cut two pieces of fabric slightly larger than the finished dimensions of your bag’s pocket (once it’s folded and seamed). Sew these fabric pieces together to create a fabric “bag,” then slip it inside your crocheted bag and hand-stitch it securely around the top opening. There are many fantastic sewing tutorials online for adding bag linings that I often refer to!
Conclusion: Carry Your Creativity with Confidence!
Wow, you’ve done it! I hope you’re feeling incredibly proud of your brand-new, handmade Easy Crochet Folded-Rectangle Crossbody Bag. Isn’t it amazing how a simple rectangle and a bit of yarn can transform into something so stylish and functional? I truly believe that even the most complex-looking projects can be broken down into simple, enjoyable steps, and this bag is a perfect example of that.
Every stitch you made, every end you wove in, and every decision you made about color or embellishment, adds to the unique beauty of your creation. Now, carry your creativity with confidence and show off your beautiful work to the world!
I would absolutely love to hear from you! What was your favorite yarn choice for this project? Do you have any lingering questions I can help with? Or even better, share a photo of your finished bag on social media and tag The Content Corner! I love seeing your beautiful creations!