

Do you ever feel that little tug, that whisper of an idea, begging you to get your hands messy and create something truly unique? I know I do, all the time! There’s a special kind of magic in crafting with your hands, in taking raw material and shaping it into something beautiful or functional. If you’ve been looking for a new creative outlet, something that’s both rewarding and incredibly accessible, then I’m so excited to share the wonderful world of clay crafts with you. Specifically, I want to introduce you to air dry clay; it’s a game-changer for beginners and opens up endless possibilities without needing any fancy equipment.
TABLE OD CONTENTS
What Exactly Are Clay Crafts? Exploring Your Options
At its heart, clay crafting is simply the art of shaping a malleable earthy material, clay, into various objects. It’s a practice as old as civilization itself, and it continues to be a fantastic way to express creativity. When I think about clay, my mind often goes to the different types you can work with.
There’s traditional pottery clay, which requires a kiln to fire and harden it; it’s a beautiful process, but kilns aren’t exactly common in most homes. Then there’s polymer clay, a plastic-based clay that you bake in your home oven, and oven-bake clay which is similar. My personal favorite, and the one I want to talk about today, is air dry clay. This kind of clay cures and hardens simply by being exposed to air, making it incredibly easy and convenient for anyone to start creating right at their kitchen table.
Why Air Dry Clay Crafts Are Your New Favorite Hobby
I remember when I first discovered air dry clay; it felt like unlocking a secret level of crafting! It brings so much joy and creative freedom, and I truly believe it’s a hobby almost anyone can fall in love with. Here’s why I think it’s perfect for you:
- Accessibility: This is a big one for me! You don’t need a specialized studio or an expensive kiln. Your kitchen table and a few simple tools are all you need to get started.
- Ease of Use: Air dry clay is wonderfully forgiving, which makes it ideal for all ages and skill levels. Whether you’re a seasoned artist or just beginning your creative DIY journey, you’ll find it easy to manipulate.
- Versatility: The possibilities with air dry clay are truly endless. From elegant home décor to playful trinkets, I’ve made so many different items. If you can imagine it, you can probably make it.
- Budget-Friendly: Compared to many other crafts, the initial investment for air dry clay and basic tools is very low. It’s an affordable way to dive into a creative pursuit.
- Kid-Friendly: I love that air dry clay is safe and non-toxic, making it a fantastic activity for little hands. It encourages imaginative play and develops fine motor skills, which is a win-win in my book.
Essential Tools and Materials for Your Air Dry Clay Crafts Journey
Starting a new craft doesn’t have to mean buying a whole new store. For air dry clay, many of the things you need might already be in your home! Here’s what I recommend gathering to begin your journey:
- Air Dry Clay: Of course, this is your star material! You can find it at most craft stores. Brands like Das and Crayola Model Magic (great for kids!) are popular choices.
- Rolling Pin: I use a small rolling pin to get even slabs of clay, but any smooth, cylindrical object like a glass bottle or PVC pipe works perfectly.
- Cutting Tools: Plastic knives, craft knives, or even cookie cutters are great for shaping your clay. I often grab a butter knife from my kitchen drawer.
- Water & Sponge/Rag: A small bowl of water and a soft sponge or rag are essential for smoothing, blending, and cleaning up as you go.
- Work Surface: I always protect my table with a silicone mat, parchment paper, or even a simple plastic placemat. This prevents the clay from sticking.
- Sculpting Tools: While you can buy a basic set of sculpting tools, I’ve found toothpicks, old pens, paper clips, or even a dull pencil can work wonders for adding detail.
- Sealants & Paints: Once your creations are dry, you’ll want to decorate and protect them. Acrylic paints are fantastic for adding color, and a sealant will help preserve your finished piece. We’ll dive into these later!
- Sandpaper: Fine-grit sandpaper is wonderful for smoothing out any rough edges or bumps once your clay has dried.
Pro-Tip from Eva: Always have a small bowl of water and a sponge handy. A little bit of water goes a long way in smoothing out imperfections and helping clay pieces adhere, but remember, too much water can make the clay sticky and hard to work with!
Your First Steps: A Beginner’s Guide to Air Dry Clay Crafts Techniques
Getting started with air dry clay is all about understanding a few basic techniques. Don’t worry, these are super easy to pick up, and you’ll be shaping beautiful things in no time!
- Preparation: Before you start shaping, it’s important to condition your clay. I usually take a piece and knead it gently in my hands for a minute or two. This warms it up, makes it more pliable, and helps remove any air bubbles.
- Basic Shaping:
- Rolling Slabs: This is foundational for many projects. I place my clay on my work surface and use a rolling pin to flatten it evenly. I often use two thin wooden dowels on either side of the clay to ensure a consistent thickness.
- Pinching: For simple bowl or pot creation, I take a ball of clay, press my thumb into the center, and then pinch the clay between my thumb and fingers, rotating as I go, to thin and expand the walls.
- Coiling: This technique is fantastic for building up forms. I roll out long “snakes” of clay between my palms and the work surface, then stack and attach them to create vessels or sculptural elements.
- Joining Clay Pieces: If I need to attach two pieces of clay, I use the “score and slip” method. I scratch crosshatch lines onto both surfaces where they’ll meet (scoring), then add a tiny bit of water to those scored areas (slip) to create a slurry. Then I press the pieces together firmly. It creates a much stronger bond!
- Smoothing Surfaces: Once I’ve shaped my piece, I often use a damp finger or a soft, damp sponge to gently rub over the surface. This removes fingerprints, seams, and any small imperfections, giving the piece a polished look.
- Adding Texture: This is where I have a lot of fun! I love pressing objects like lace, leaves, stamps, or even textured fabrics into the clay to create interesting patterns. Simple tools like toothpicks can also be used to carve lines or dots.
Inspiring Air Dry Clay Crafts Projects to Spark Your Creativity
Now for the really fun part: imagining what you can create! Air dry clay lends itself to so many different projects, I find myself constantly thinking of new things to try. Here are some ideas to get your creative juices flowing:
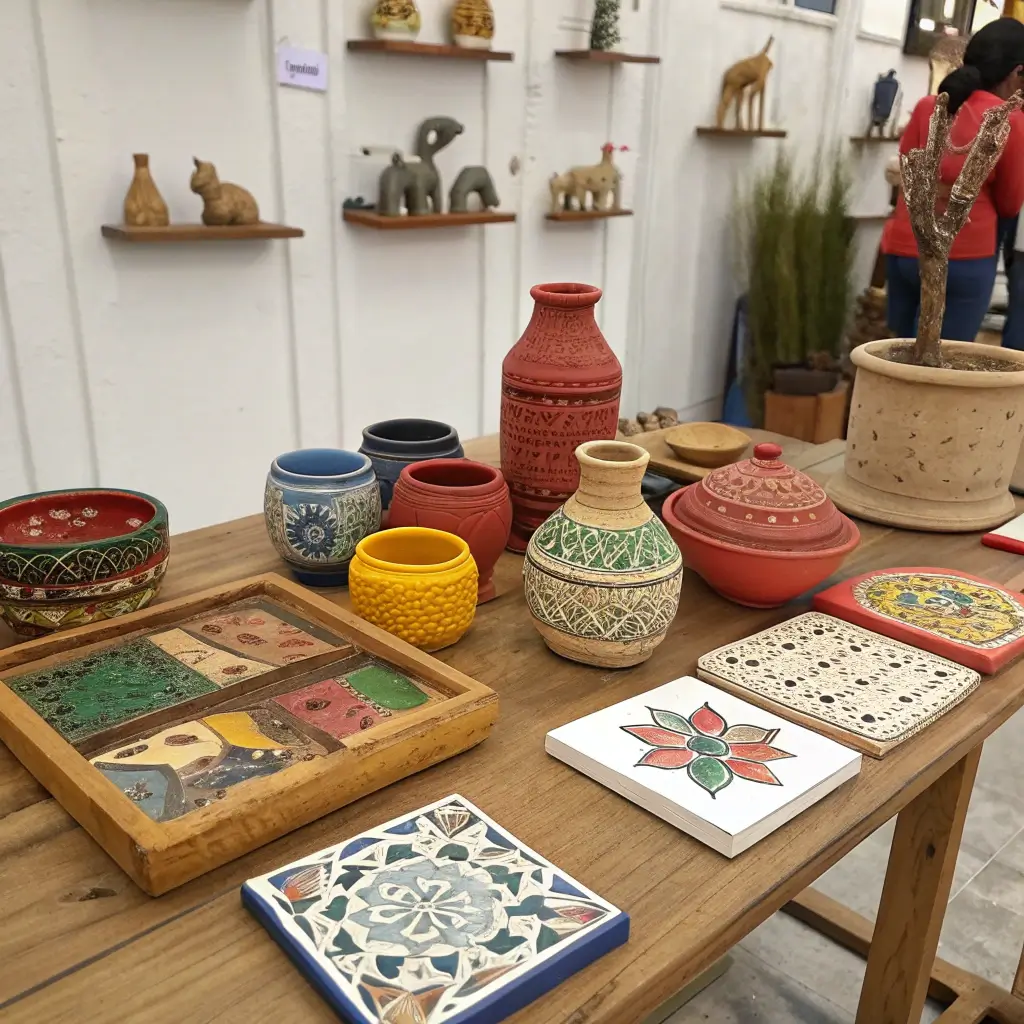
- Home Decor Clay Crafts: I’ve made charming coasters to protect my tables, elegant small dishes for jewelry, and even decorative vases (though I always seal them thoroughly if I plan to use them for faux flowers). Discover more inspiration for handmade home decor items like trinket trays, magnets, and intricate wall hangings.
- Wearable Clay Crafts: You can easily create simple pendants or earrings by cutting out shapes, adding a small hole for a jump ring before drying, and then painting them.
- Gifts & Functional Clay Crafts: Small decorative planters for succulents, quirky pen holders for a desk, or personalized keychains make wonderful gifts.
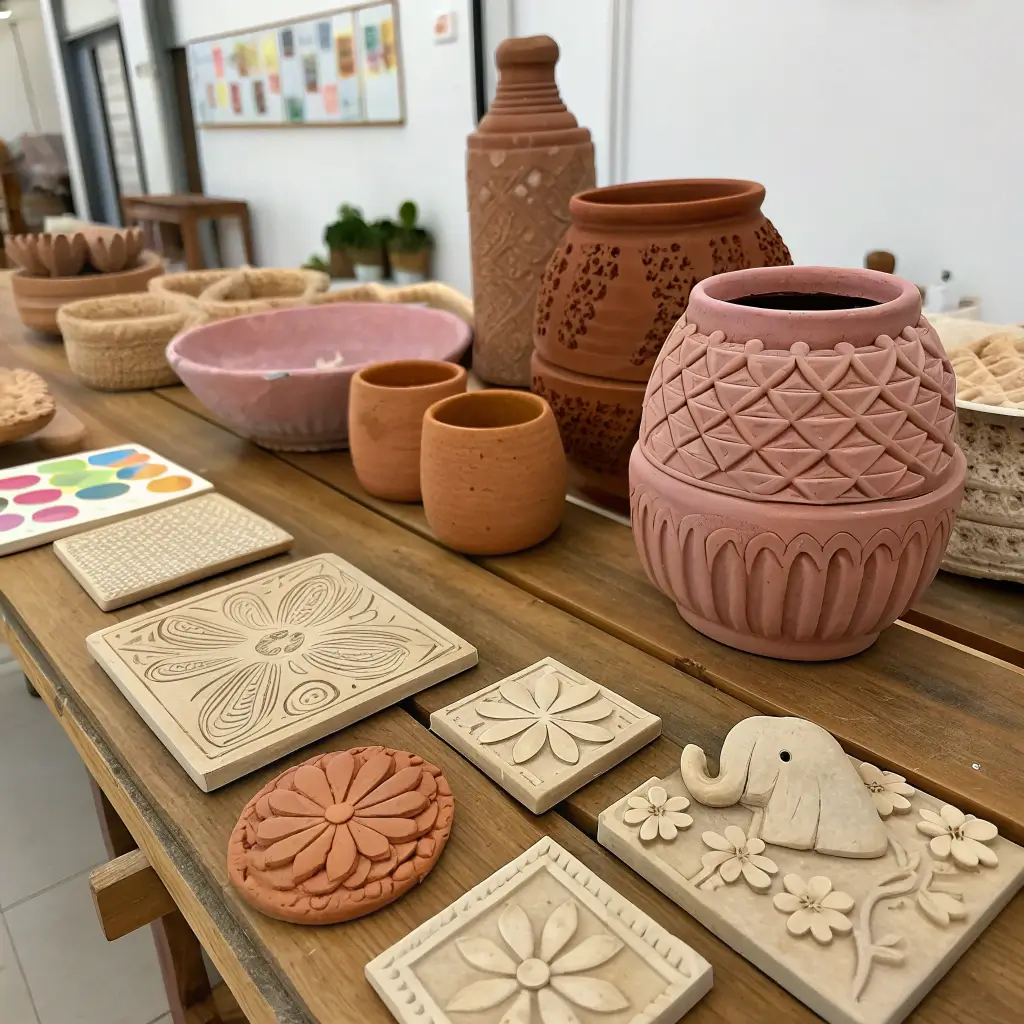
- Kid-Friendly Clay Crafts: My favorite projects with kids are simple animal figures, precious handprint keepsakes, or painting decorative rocks after they’ve dried. You can even try making a fantastic plant cell model for a school project!
Step-by-Step Project: DIY Geometric Clay Dish
I want to walk you through a simple project that’s perfect for beginners. This geometric clay dish is fantastic for holding keys, jewelry, or just as a decorative accent.
- Gather Materials: You’ll need your air dry clay, a rolling pin, a sharp knife or ruler, a small bowl (for shaping), water, and fine-grit sandpaper. For finishing, gather acrylic paints and a sealant.
- Roll Your Slab: Take a good chunk of clay and knead it until it’s pliable. Then, on your protected work surface, use your rolling pin to roll it out into an even slab, about 1/4 inch thick. I always aim for consistency, as it helps with even drying. (Image: Clay slab being rolled evenly)
- Cut Your Shape: Now, decide on your geometric shape! I like a hexagon or a square for this project. Use a ruler and a craft knife (or even the side of a plastic ruler for straight edges) to cut out your desired shape from the clay slab. Remove the excess clay. (Image: Clay slab with a geometric shape being cut out)
- Form the Dish: Carefully lift your cut shape and gently press it into a small, shallow bowl or dish that you want to use as a mold. Allow the edges to rise slightly, forming a shallow lip. You can also gently pinch the edges upwards freehand to create a more organic form. (Image: Clay shape being pressed into a small bowl for shaping)
- Smooth Edges: Dip a finger or a small sponge in water and gently run it along all the edges of your dish. This smooths out any rough cuts and creates a clean finish. (Image: Finger smoothing the edges of the clay dish)
- Drying: Carefully remove your dish from the mold (if used) and place it on a piece of parchment paper or a wire rack to dry. Make sure it’s in a spot with good air circulation. This usually takes 24-72 hours, depending on thickness and humidity.
- Finishing Touches: Once your dish is completely dry, I use fine-grit sandpaper to gently smooth any remaining rough spots. Then comes the fun part: painting! Use acrylic paints to add colors, patterns, or designs. When the paint is dry, apply a sealant to protect your beautiful creation. (Image: Finished, painted, and sealed clay dish)
Caring for Your Clay Crafts: Drying, Storing, and Finishing
Making your clay crafts is only half the fun; ensuring they last and look their best is also important! I’ve learned a few tricks over the years for drying, storing, and giving my pieces a beautiful finish.
- Drying Process:
- How long does air dry clay take to dry? Generally, it takes anywhere from 24 to 72 hours, but this can vary a lot! Thicker pieces will take longer, and humid environments can extend drying time significantly.
- For even drying, I always recommend turning your piece every 12-24 hours. Placing it on a wire rack allows for air circulation all around. Avoid direct heat, as rapid drying can cause cracking.
- You’ll know it’s fully dry when it feels hard, cool to the touch, and often, lighter in weight. It shouldn’t feel damp or cold in any spots.
- Storing Unused Clay: To keep my unused clay fresh and pliable, I always wrap it tightly in plastic wrap, then place it in an airtight container or a Ziploc bag. If it seems a little dry, I might add a slightly damp paper towel to the container to reintroduce some moisture.
- Finishing Touches:
- Sanding: Once completely dry, I use fine-grit sandpaper (like 220-grit) to smooth out any rough patches, bumps, or sharp edges. This step really elevates the final look of your piece.
- Painting: Acrylic paints are my go-to for air dry clay. They offer vibrant colors, dry quickly, and adhere beautifully. I often apply a base coat and then add details.
- Adding Texture & Details: After drying, you can still add more character! I sometimes use a carving tool or a sharp pencil to etch patterns or details into the hardened surface before painting or sealing.
- Sealing and Waterproofing: Sealing is crucial for durability, protecting your paint, and, in some cases, adding a degree of water resistance. It’s important to match your sealant to your project.
| Sealant Type | Pros | Cons | Best Use Cases |
|---|---|---|---|
| Mod Podge | Easy to use, matte/gloss options | Not truly waterproof, can be tacky | Decorative items, light-duty protection |
| Acrylic Sealer | Durable, water-resistant, fast-drying | Can be strong-smelling, needs ventilation | Coasters, planters, items needing more protection |
| Clear Varnish | High shine, very durable, waterproof | Can be thick, longer drying time | Jewelry, highly handled items, outdoor decor (if specified) |
Troubleshooting Common Air Dry Clay Crafts Issues
Even seasoned crafters run into little bumps in the road, and that’s totally okay! I want to share some common issues I’ve encountered with air dry clay and how I usually solve them.
- Cracking: This is probably the most common issue. Cracking often happens if the clay dries too quickly, if sections are vastly different in thickness, or if it wasn’t kneaded properly. I try to ensure even thickness, dry my pieces slowly away from direct heat, and turn them frequently. For small cracks, I often fill them with a bit of fresh clay mixed with water (a slip) and smooth it over.
- Warping: If your flat pieces or dishes seem to bend or warp during drying, it’s usually due to uneven drying or being dried on an irregular surface. I always place flat items on a perfectly flat surface, like a piece of parchment paper on a cutting board, and turn them frequently to minimize distortion.
- Clay Not Drying Properly: If your piece is still damp after a few days, it might be too thick, the humidity in your room could be high, or there isn’t enough air circulation. I try to move the piece to a drier spot with good airflow, and if it’s very thick, I might have to be extra patient.
- Surface Imperfections: Bumps, fingerprints, or dust can show up. I make sure my hands and workspace are clean, and I diligently smooth surfaces with a damp sponge or finger before the clay gets too dry. Small bumps can be gently sanded away once dry.
- Clay is Too Hard/Dry to Work With: If your clay has partially dried out, don’t despair! For small pieces, I sometimes spray them lightly with water, wrap them in plastic wrap, and let them sit for an hour or two to rehydrate. For larger, harder chunks, it might be time to start with fresh clay.
Safety and Best Practices for Clay Crafts
As a knowledgeable and responsible guide, I always emphasize safety, especially when I’m crafting with my nephews or nieces. Making things should be fun and worry-free!
- Ventilation: When you’re painting or, especially, applying sealants, it’s really important to have good air circulation. I always open a window or work in a well-ventilated area to avoid inhaling fumes.
- Cleanliness: I always make sure to wash my hands thoroughly after working with clay, and I keep my workspace tidy. This prevents clay dust from getting everywhere and ensures my next project starts clean.
- Child Safety: If kids are crafting with you, supervision is key. I always make sure they use non-toxic materials, and I avoid very small pieces that could be a choking hazard for very young children. Their safety is always my top priority.
- Disposal: I never wash large amounts of clay down the drain, as it can cause clogs. I let my wash water settle, pour off the clear water, and dispose of the clay sludge in the trash. Unused, dried clay scraps go straight into the trash.
Understanding the Limitations of Air Dry Clay Crafts
While I absolutely adore air dry clay for its versatility and ease, it’s also important to understand what it’s not best suited for. Knowing its limitations helps manage expectations and prevents disappointment.
- Food Safety: Generally, air dry clay is not food-safe. Even with a sealant, I wouldn’t recommend using it for dishes that will directly touch unpackaged food, especially if it’s heated or holds liquid.
- Water Retention: Without extensive, specialized sealing (and even then, it’s a gamble), air dry clay is not suitable for holding water. If you want a functional vase for fresh flowers, a different type of clay is needed.
- Durability: Air dry clay is durable for decorative purposes, but it’s less strong than kiln-fired pottery or even oven-baked polymer clay. It can be brittle and prone to breaking if dropped or roughly handled, so I always handle my pieces with care.
- Outdoor Use: I don’t typically recommend air dry clay for prolonged outdoor exposure. Unless you use heavy-duty, weather-resistant outdoor sealants (which aren’t always effective long-term), rain, humidity, and temperature changes will cause it to break down.
Where to Source Your Clay Crafts Supplies
Getting your hands on air dry clay and the right tools is usually quite easy! I love knowing there are so many options available.
- Craft Stores: Popular chains like Michaels, Hobby Lobby, or Jo-Ann Fabrics are fantastic places to find a wide variety of air dry clay, sculpting tools, paints, and sealants. I often find myself browsing their aisles for inspiration.
- Online Retailers: Amazon is always a convenient option for ordering clay and supplies, especially if you have a specific brand in mind. Specialty craft sites also offer a broader range of unique tools and materials.
- Local Art Supply Stores: I always try to support my local art supply stores. They often have knowledgeable staff who can offer great advice, and it’s wonderful to see the materials in person.
- Recommendations: For general crafting, I personally love working with Das air dry clay because it’s smooth and reliable. For projects with kids, Crayola Model Magic is fantastic – it’s super lightweight and easy for little hands to manage.
Frequently Asked Questions about Clay Crafts
I often get questions about air dry clay, so I’ve put together some of the most common ones to help you out!
- Can air dry clay be used for functional items? Yes, absolutely, but with caveats. I use it for trinket dishes, pen holders, or decorative planters. Just remember its limitations regarding food safety and water retention.
- How do you make air dry clay waterproof? To make it water-resistant, you need to apply several coats of a good quality, waterproof sealant, like an acrylic sealer or a clear varnish, both inside and out. Even then, I don’t trust it to hold standing water for long periods.
- What’s the difference between air dry clay and polymer clay? Air dry clay hardens with air exposure, while polymer clay needs to be baked in an oven. Polymer clay is generally more durable and slightly flexible after baking, making it great for jewelry, whereas air dry clay can be more brittle.
- Can you bake air dry clay? No, you should not bake air dry clay. It’s formulated to harden by air, and baking it in an oven can cause it to crack, burn, or even release fumes, depending on the brand.
- How do you repair broken air dry clay? For small breaks, I sometimes use a strong craft glue (like super glue or E6000). For larger pieces, you can try reattaching with a bit of fresh clay slip and then blending it in, but sometimes a clean break is best fixed with glue.
- Is air dry clay heavy? It depends on the brand and how thick your piece is. Some brands are denser and will feel more substantial, while others, like Crayola Model Magic, are incredibly lightweight.
Unleash Your Inner Artisan with Clay Crafts!
I truly hope this guide has inspired you to dive into the rewarding world of air dry clay crafts. There’s such a unique satisfaction that comes from taking a lump of clay and transforming it into something beautiful with your own hands. It’s accessible, affordable, and incredibly versatile, making it the perfect creative outlet for anyone, regardless of experience.
Don’t be afraid to experiment, to get a little messy, and to let your imagination lead the way. I promise you’ll find joy in the process and pride in your handmade creations. What air dry clay craft are you excited to try first? Share your ideas or questions in the comments below – I’d love to hear from you!