Embarking on a bathroom renovation can feel overwhelming, a maze of choices, dimensions, and hidden costs. But what if you could unlock the secrets to creating not just any bathroom, but your truly ideal bathroom layout – a space that blends flawless functionality with breathtaking aesthetics and future-proof innovation? This comprehensive guide cuts through the confusion, offering a meticulous blueprint for designing a bathroom that perfectly suits your lifestyle, space, and budget. By the end, you’ll possess the knowledge, tools, and confidence to transform your vision into a stunning reality, making this article your definitive resource for mastering every aspect of bathroom layout design.
TABLE OF CONTENTS
Understanding What Makes an “Ideal” Bathroom Layout
Defining an “ideal” bathroom layout is highly personal, extending far beyond mere aesthetics. It’s about creating a space that functions seamlessly, looks beautiful, and enhances your daily life. An ideal layout prioritizes usability, safety, and efficiency while reflecting your unique style and needs. Many factors influence this, including the physical space available, your budget, the number of users, and crucial local building codes. Effective planning is paramount to ensure your new layout serves you for years to come without costly reworks. This guide will walk you through every step, ensuring you consider all critical elements.
Quick Quiz: What’s Your Ideal Bathroom Priority?
- Functionality: Do you need maximum storage, efficient traffic flow, or specific accessibility features?
- Aesthetics: Is your focus on a spa-like retreat, a minimalist design, or a bold statement?
- Efficiency: Are water conservation and energy savings high on your list?
- Personal Needs: Do you have a large family, specific mobility challenges, or a desire for smart home integration?
Foundational Principles of Bathroom Layout Design
Every successful bathroom layout, from the smallest powder room to the most luxurious master en-suite, adheres to fundamental design principles. Understanding these basics is crucial before you even start thinking about specific fixtures.
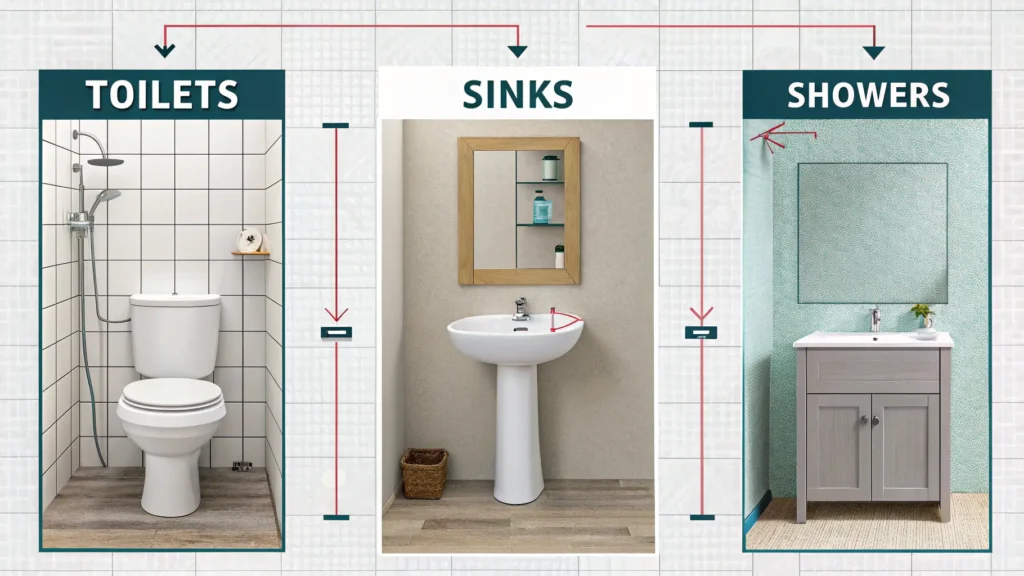
- Standard Dimensions and Clearances: Respecting minimum clearances around toilets, sinks, and showers isn’t just about comfort; it’s often a building code requirement. For example, a toilet typically needs at least 15 inches from its center to any side wall or fixture, and at least 21 inches of clear space in front.
- Understanding Plumbing Walls and Wet Zones: Grouping plumbing fixtures on shared walls (often called a “plumbing wall” or “wet wall”) significantly reduces renovation costs and complexity. This minimizes the need to reroute supply and drain lines. Designating “wet zones” for showers, tubs, and toilets further streamlines plumbing.
- Optimal Ventilation Requirements: Proper ventilation is critical to prevent mold, mildew, and moisture damage. Exhaust fans must be adequately sized for the room and vented to the outside, not just into an attic.
- Effective Door and Window Placement: Doors should swing clear of fixtures and ideally not obstruct traffic flow. Pocket doors or barn doors can be excellent space-saving alternatives. Windows provide natural light and ventilation but must be strategically placed for privacy.
- Maximizing Natural Light and Privacy: Incorporate natural light where possible through windows, skylights, or sun tunnels. For privacy, consider frosted glass, higher window placement, or strategic landscaping.

Exploring Common Bathroom Layout Configurations
Understanding the various configurations is key to finding your ideal bathroom layout. We’ll categorize them first by fixture count, then by room shape, and finally explore specialized setups.
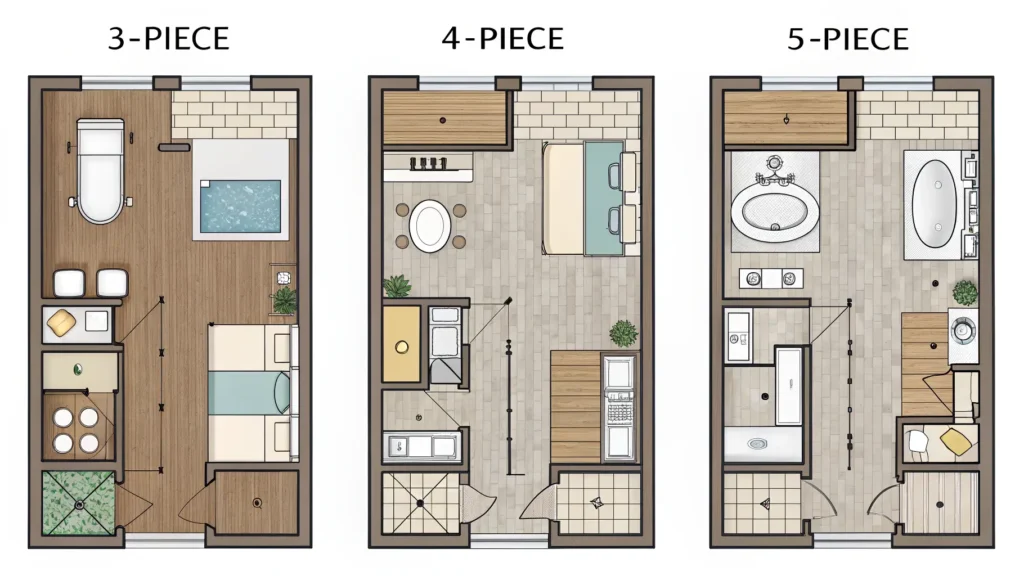
Layouts by Fixture Count (3-Piece, 4-Piece, 5-Piece Bathrooms)
This common classification helps define a bathroom’s basic functionality and space requirements.
- Three-Piece Bathrooms:
- Definition: Typically includes a toilet, a sink, and one bathing fixture (either a shower or a bathtub, usually a shower/tub combo).
- Ideal Scenarios: Often found in guest bathrooms, smaller homes, or as a secondary bathroom. It’s an efficient use of space.
- Space Requirements: Can be quite compact, with minimum dimensions around 5×8 feet for a full bath with a tub.
- Common Variations: Shower-only options for walk-in accessibility.
- Four-Piece Bathrooms:
- Definition: Features a toilet, a sink, and two distinct bathing fixtures (e.g., a separate shower and a bathtub).
- Ideal Scenarios: Master bathrooms or larger family bathrooms where separate bathing options are desired.
- Space Requirements: Requires more square footage, often 8×8 feet or larger, to comfortably accommodate all elements.
- Common Variations: Double sinks in a shared vanity, or a larger shower with seating.
- Five-Piece Bathrooms:
- Definition: Includes a toilet, two sinks (often a double vanity), and two distinct bathing fixtures (separate shower and bathtub).
- Ideal Scenarios: Luxurious master suites, allowing for ultimate comfort and convenience for multiple users.
- Space Requirements: Needs substantial space, typically 10×10 feet or more, to avoid feeling cramped.
- Common Variations: Enlarged walk-in showers, spa tubs, or private toilet enclosures.

Layouts by Room Shape & Spatial Efficiency (Corridor, L-Shape, U-Shape, Single-Wall)
Beyond fixture count, the shape of your bathroom dictates how efficiently you can arrange elements.
- The Corridor Layout:
- Description: Fixtures are aligned along two opposite walls, creating a central aisle.
- Best Use Cases: Long, narrow rooms. Maximizes the functional length of the space.
- Pros & Cons: Good for flow; can feel narrow if not enough width.
- The L-Shape Layout:
- Description: Fixtures are placed along two adjacent walls, forming an “L.”
- Best Use Cases: Square or slightly rectangular rooms. Allows for a more open central area.
- Pros & Cons: Offers good balance of space and functionality; can sometimes limit larger fixtures.
- The U-Shape Layout:
- Description: Fixtures are arranged along three walls.
- Best Use Cases: Larger, square rooms. Often used in master bathrooms to maximize fixture count.
- Pros & Cons: Excellent for incorporating many features; requires significant space to prevent crowding.
- The Single-Wall Layout:
- Description: All fixtures are arranged along one wall.
- Best Use Cases: Smallest bathrooms, powder rooms, or where plumbing access is limited to one side.
- Pros & Cons: Most economical for plumbing; can be challenging for incorporating a full bath or creating varied design.

Specialized Layouts (Powder Room/Half Bath, Master En-Suite, Accessible Bathrooms)
Sometimes, the ideal bathroom layout requires a specific focus.
- Powder Room/Half Bath:
- Unique Design Considerations: Focus on maximizing small spaces with wall-mounted sinks, compact toilets, and clever storage solutions. Aesthetics are often primary as it’s a guest-facing room.
- Key Elements: Toilet, sink. Minimum size often around 3×6 feet.
- Master En-Suite:
- Luxury and Functionality: Often includes double vanities, separate soaking tubs and large walk-in showers, private toilet areas, and ample storage. The focus is on a luxurious, private retreat.
- Key Elements: Often 4- or 5-piece layouts, integrated with master bedroom design.
- Accessible Bathrooms:
- Key Elements for Universal Design: Wider doorways (36 inches), grab bars, roll-in showers (no curb), accessible vanity heights (often open underneath for wheelchair access), turning radius requirements (60 inches clear diameter), non-slip flooring, and lever-style faucets.

Strategic Planning & Pre-Design Considerations
Thorough planning is the secret weapon against costly mistakes. Before moving a single pipe or demolishing a wall, these considerations are paramount.
Budgeting for Your Bathroom Layout Project
Understanding the financial scope is a critical first step for any ideal bathroom layout project.
- Breakdown of Costs:
- Plumbing: Rerouting pipes is a major cost driver. Expect to pay for new pipes, fittings, and labor.
- Electrical: Moving outlets, adding new lighting, or installing heated floors will require an electrician.
- Demolition & Construction: Removing old fixtures and walls, framing new ones.
- Finishes: Tiles, paint, vanity, fixtures, countertops, mirrors – these vary widely in price.
- Labor: A significant portion of any renovation budget.
- Estimating Tools: Use online calculators and get multiple quotes from contractors.
- ROI Considerations: Minor bathroom remodels often yield a good return on investment, but extensive layout changes can be costly. Balance your desires with future resale value.
Navigating Permits & Building Codes
Ignoring regulations can lead to fines, forced reconstruction, and safety hazards.
- Importance of Local Regulations: Building codes vary by municipality. They dictate everything from ventilation requirements to electrical outlets near water and fixture clearances.
- Typical Permits Required: Moving plumbing, electrical work, structural changes (like moving a wall), or changing the footprint of a room almost always requires permits.
- When to Consult a Professional: Always consult with a licensed contractor, architect, or your local building department before starting any layout modifications.
Essential Project Management & Timelines
A well-managed project ensures a smoother renovation process.
- Step-by-Step Planning Process:
- Define your needs and desires.
- Research design ideas and gather inspiration.
- Develop a preliminary layout plan.
- Set a realistic budget.
- Consult with professionals (designer, contractor).
- Obtain necessary permits.
- Order materials and fixtures.
- Execute demolition and construction.
- Final installation and finishing touches.
- Key Milestones: Demolition, rough-in plumbing/electrical, inspection, drywall, flooring, fixture installation, painting.
- Realistic Timelines: A significant bathroom layout change can take anywhere from 6-12 weeks, not including planning and material lead times.
Designing for Modern Needs: Accessibility, Sustainability & Smart Home
To create a truly ideal bathroom layout in the 21st century, consider integrating design elements that go beyond basic functionality.
Accessibility & Universal Design Principles
Designing for everyone means creating spaces that are usable by people of all ages and abilities.
- Key Elements:
- Wider Doorways: At least 34-36 inches wide to accommodate wheelchairs.
- Grab Bars: Strategically placed near toilets and showers for support.
- Roll-in Showers: Curbless entry for easy access, often with a bench and handheld shower.
- Accessible Vanity Heights: Sinks that are open underneath for wheelchair users, often 34 inches high.
- Turning Radius Requirements: A 60-inch clear diameter is generally needed for a wheelchair to turn.
- Non-Slip Flooring: Textured tiles or vinyl for safety, especially when wet.
Sustainable & Eco-Friendly Bathroom Layouts
Make your bathroom kind to the planet and your wallet.
- Water-Saving Fixtures: Low-flow toilets (1.28 GPF or less), water-efficient showerheads (2.0 GPM or less), and aerated faucets.
- Energy-Efficient Lighting: LED lighting throughout, including task lighting and ambient illumination.
- Sustainable Material Choices: Opt for recycled glass tiles, bamboo or reclaimed wood vanities, low-VOC paints, and locally sourced materials to reduce your carbon footprint.
- Maximizing Passive Ventilation: Strategic window placement to create cross-breezes, reducing reliance on exhaust fans.
Integrating Smart Home Technology
Future-proof your bathroom with cutting-edge tech.
- Smart Mirrors: Integrated displays for news, weather, or even virtual makeup application.
- Automated Lighting Zones: Motion-activated lighting, dimmers, and color-changing LEDs for different moods.
- Digital Shower Controls: Precise temperature and pressure settings, pre-set preferences, and even steam shower integration.
- Smart Ventilation Systems: Humidity-sensing fans that turn on automatically when needed.
- In-Floor Heating: Programmable radiant heating for ultimate comfort on cold mornings.
Common Bathroom Layout Mistakes to Avoid & How to Fix Them
Even experienced designers can overlook critical details. Proactively addressing these common pitfalls will help you achieve an ideal bathroom layout.
- Poor Traffic Flow: Placing the toilet directly in front of the door or blocking the path to the shower.
- Fix: Ensure clear pathways (minimum 24-30 inches wide) and avoid placing large fixtures where they impede movement.
- Inadequate Storage: Underestimating the need for linens, toiletries, and cleaning supplies.
- Fix: Incorporate built-in niches, tall linen cabinets, recessed medicine cabinets, and vanity drawers.
- Neglecting Ventilation: Insufficient or improperly vented exhaust fans leading to moisture problems.
- Fix: Install an appropriately sized fan (80-110 CFM for most bathrooms) vented directly outside.
- Incorrect Fixture Scale: A tiny sink in a grand master bath, or an oversized tub overwhelming a small space.
- Fix: Choose fixtures proportionate to the room size and other elements.
- Sacrificing Privacy: A clear glass shower door directly facing the toilet or a window overlooking a neighbor’s yard.
- Fix: Use frosted glass, strategically placed walls, or window treatments.
- Ignoring Electrical Outlets: Not enough outlets, or outlets not placed conveniently for hairdryers, electric toothbrushes, etc.
- Fix: Plan for multiple GFCI-protected outlets, considering their placement relative to the vanity and other functional zones.
- Not Planning for Future Needs: Failing to consider aging-in-place or potential changes in family structure.
- Fix: Incorporate universal design principles where possible, even if you don’t need them now (e.g., blocking in walls for future grab bars).
Architect’s TOP 10 Bathroom Design Mistakes (& How to Fix Them)
Tools & Resources for Visualizing Your Ideal Layout
Bringing your vision to life is easier with the right tools.
- Overview of Online 2D/3D Layout Planners: Many free and paid online tools allow you to drag and drop fixtures, input dimensions, and see your layout in 2D or 3D. Popular options include RoomSketcher, Planner 5D, and IKEA’s Home Planner.
- Mood Board Creation Tools: Pinterest, Canva, and physical mood boards help you collect and organize design inspiration, colors, and material samples.
- When and How to Work with Professional Designers:
- Architects: Essential for structural changes, complex layout modifications, or new additions.
- Interior Designers: Specialize in aesthetics, space planning, material selection, and project management.
- Contractors: Critical for the physical execution of your plan, understanding building codes, and managing trades.
Frequently Asked Questions (FAQs) About Bathroom Layouts
We’ve compiled answers to the most common questions to further assist you in planning your ideal bathroom layout.
What is the minimum size for a full bathroom?
A full bathroom (toilet, sink, shower/tub combo) typically requires a minimum of 35-40 square feet, often around 5×8 feet, to meet code clearances.
How much does it cost to move plumbing?
Moving plumbing can be one of the most expensive aspects of a layout change, ranging from a few hundred dollars for minor adjustments to several thousand for extensive rerouting of supply and drain lines, depending on complexity and location.
Can I change my bathroom layout without permits?
Generally, any significant changes to plumbing, electrical, or structural elements of your bathroom will require permits. Always check with your local building department to confirm regulations.
What is the best layout for a small master bathroom?
For a small master bathroom, an L-shaped or single-wall layout often works best, maximizing space with compact fixtures, walk-in showers (instead of tubs), and wall-mounted vanities to maintain an open feel.
How do I choose the right size fixtures?
Measure your available space carefully and ensure fixtures meet minimum clearance requirements. Use tape to mark out fixture footprints on your floor. For sinks and vanities, consider the number of users and storage needs.
